Once you become more experienced, you may decide to try to create your own woodworking plan. This is a strong idea for business owners or those who are seeking to sell their work as a packaged product. In this comprehensive guide, we will go over what needs to be done to create your own.
Going from idea to finished plan is a meticulous process that involves proper step-by-step procedures that must be followed. This is to ensure your buyers or those who simply follow your plan can actually build what you show your plan instructs. This is especially critical is you plan on selling your plans.
If you’re a simple hobbyist, a professional carpenter, a woodwork professional, or even a business owner seeking to package a plan as part of a profit, here is how to make your ideas come to life and have other people building what you created.
Table of Contents
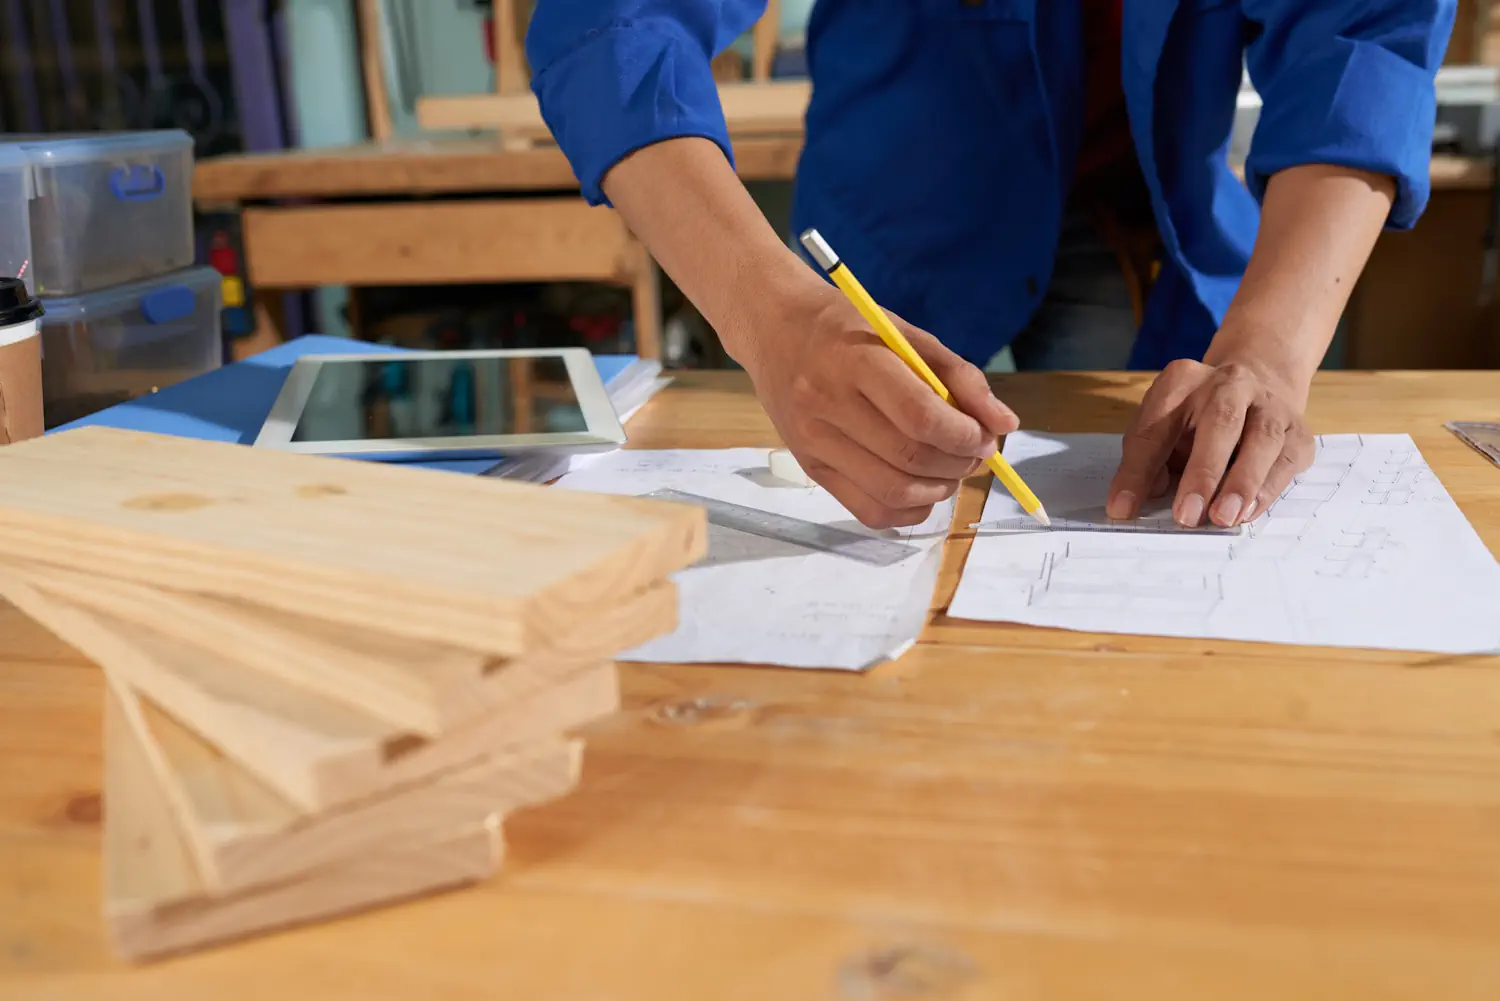
Start With A Simple Sketch
Start by sketching how you want the finished product to look. This is assuming you have already determined the use case of the product. The first sketch doesn’t need to be too technical or detailed. You will add the details and dimensions later. Once you have made your original sketch, determine the dimensions of the total finished product. Once finished, identify any areas where your product may have moving or removable parts. This is so you can illustrate how the product can transform by moving parts of it. For example, a bench that doubles as a table.
Define It's Function & End Use
Understanding the end use of your woodworking project is fundamental. It is vital to clarify whether the final piece will serve as furniture, a decorative item, a toy, storage, or a functional tool. This initial clarification builds a foundation that will guide subsequent planning stages, ensuring your project meets its intended purpose, and is possible to build.
Knowing the end use will also help you predict the conditions the finished product will face, influencing decisions related to materials, construction techniques, and finishing processes. It will enable you to tailor your product to suit the specific demands and aesthetic preferences associated with the item’s function. Knowing the end use will also be part of your marketing if you intend to sell the product.
Use Creativity
Once the products function is clear, listing down the specific needs of your project is the next step. This may require some creativity on this part. This part can be fun because you get to decide what kinds of tools, materials, fabrication techniques, and assembly methods you would like to use, both beginner and advanced.
Detailing what these aspects can be offers a creative scope of what you will need to do, initiates a plan to creating your product, and allows flexibility in your plans final draft. It wil also avoiding disappointments related to functionality, appearance, and durability, setting a clear path for the subsequent stages of planning.
Define Specifications
Specifications are simply details and metrics your plan will be designed for. For instance, if you are planning an equisite dining room table, things to determine are the the strength of the legs, the height of the top of the table from the ground, the weight limit of the table, the length & width of the table, the strength of the hardware in supported junctions, and any other detail that will need a certain condition to be met to create your own woodworking plan.
Understand The Parts of a Good Plan
Look at other successful plans and break down what made them so effective. Chances are if you’re here you’re a professional woodworker and have come accross your fair share of woodworking plans. Look at ones you found effective, easy to follow, and complete, and model those plans. Also, consulting with experienced woodworkers or participating in online woodworking forums and communities can be immensely beneficial for this as well. These interactions can expose you to a wealth of knowledge and different perspectives, enhancing your planning process.
Things To Consider
Creating a woodworking plan requires some inspiration, and you don’t have to reinvent the wheel. Whether you’re making this plan for profit, for fun, or for someone else who asked or paid you to create it, there will be someone who will read and follow the instructions laid out in your plan to make your final product. With this, it must be considered who will be making this product and why. If you were commissioned to create this plan, this isn’t important to you.
When your product is finished, some things to consider would be the reading and comprehension level of who is making it, the skill level they have when building, their access to certain tools and machinery to create it, and their profession as it relates to woodwork. For instance, a woodwork busines owner may want your plan for its use value and market demand. A beginner woodworker or even a child may want it for a science project or a toy he wants.
Rough Draft Your Plan
Your rough draft will simply be a loosely sketched and detailled model of your end products size, dimensions, materials, assembly methods, moving parts, and any other special inclusions such as removable parts or special additions. This will be far from perfect, and shouldn’t require a lot of time to do. There will be plenty of time for perfecting your design later.
Focus on what you want the functionality, aesthetic, design, and size to be and reverse engineer that. While doing so, you may have to make adjustments such as selecting stronger materials, larger hardware, more specialized tooling, and even adjusting some dimensions.
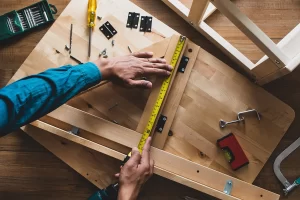
Draw Out Individual Dimensioned Parts
Once you have a rough draft and drawing, sketch out what individual parts may need to be used. If you’re familiar with the engineering would or profesionally drafting a design, this part will be a rather subjective process as far as how you want things to be dimensioned and how clear those dimensions are.
The dimensions of these parts will have to line up to make sure holes align with other holes, length and width and height requirements are met, and proper hardware can be used when attaching everything together. The dimesions don’t have to be perfect right now. After all, adjustents will be done once the parts are fabricated and fitted together.
Identify the Best Hardware Needed
The hardware will tie everything together. Hardware includes things such as screws, washers, nuts, bolts, fasteners, dowels, hinges, and anything consumable that will become part of the product. A couple of other special consumables used on your product would be glue, epoxy or varnish. Identify what all your plans users would need in order to create your product.
Make a list of the best hardware in your experience to use. This can even be used when estimating the budget your users may require. Chances are, they already have the hardware, or have their own method of fabrication. But it’s good to add a shopping list incase they dont have something.
Identify Required Tools
Identifying and listing the necessary tools for each step of the construction process is vital. Ensuring access to the required tools, including safety equipment like goggles and ear protection, prevents interruptions, improves the quality of the finished product, and contributes to efficient and safe work practices. This preparation is crucial for maintaining a smooth workflow and preventing avoidable delays.
Best Use Case Tools List
Most of us woodworkers have an arsenal of tools we already employ when making our woodworking products. But in this case, this is your plan, which means it’s best to recommend a tool to the person following your plan. In some cases, where a woodwork may lack experience or technical expertise, your guidance as to what tool to use is preferred.
Listing out the best tools for the project can help make money for your business when you create a woodworking plan. If you sell your own tools, or have a list of the best tools, you can attach a website to your plan that will lead to the product your recommend as the best tool for the job. Your plans followers will see your suggestion and purchase what they need because of you.
Have Alternative Tools Listed Just Incase
Always have a list of alternative tools. If your plan calls for heavy machinery, or tools that are very expensive such as power tools, and your users don’t own or have access to that machine, inform them of alternate methods with other tools they can use. This isn’t required, but is good so your users can have an idea of what they can do if they get stuck on a step because they lack the suggested tool or machine.
List Needed Materials
Identifying additional materials and hardware is an essential planning step. This includes listing wood type and size, fasteners, glues, and finishing products ensuring they are compatible with your chosen wood type and meet your prjects structural strength speifications. A comprehensive list aids in budgeting and ensures you have all necessary items at hand when starting your project.
Create a detailed list of all materials needed and the quantity of each. Include items such as paint, glue, stain or polyurethane. Consider the tools that will be needed to complete the project. Do you have all that you need? With this information, you can then determine the overall cost. Take this list with you when you go out to purchase supplies.
Wood Type
Determine what type of wood you will use in your project, required sizes, and how much wood you will need. Choosing the right wood is integral to your project’s success. Consider the properties of different wood types, like hardness, grain pattern, color, and workability, and select one that suits your project’s needs. This decision influences the durability, appearance, and difficulty of your project, impacting the overall quality of the finished piece.
The chosen wood type also dictates the suitable finishes, fasteners, and adhesives to be used. Therefore, thorough knowledge and consideration of wood properties ensure compatibility with other materials and processes, avoiding potential issues during construction and ensuring the longevity of the final product. Budget at this point will be difficult to pinpoint, but will become clear as we get closer to the end of creating your own woodworking plan.
Hardware
When determing hardware, there will be many factors that dictate what you will need. A definitive list of what hardware you will need and the count of each piece of hardware will be finalized at the end of the project. It’s common that some hardware will have to be adjusted as you asemble your fabricated parts. Aspects such as strength of hardware, length of hardware, placement of where the hardware will go, or even the exact count of the hardware are hard to determine right away.
That’s perfectly acceptable during creating your own woodworking plan. Fortunately, hardware is the cheapest part of this process. Knowing this, it’s best to have more than you need in the beginning. Consider things like the length of your screws, the size of dowels, any lock washers you need, how many nuts you will need for any screws, and other aspects related to questions like that. What about the size of your wood? Does the material of wood make any difference? Answer all these questions, and on the next step, you will be able to state the exact hardware requirements.
Special Needs You May Have
To create your own woodwork project, you may have specific needs for your project that are related to it’s use case. If your product needs more strength, you may call out to use a cartain glue. If your product is going to be used outside, you may want to coat it in weather sealant or even use outdoor grade treated wood. Of even if your product will be used with food like cutting boards, you may want to consider food safe epoxies.
These are special cases where you as the creator must cover all your bases. Based on the end use, you can determine all these special need cases. This is critical especially if people are going to use your product as one to sell instead of one for personal use.
Fabricate Parts & Build Your Product
Now is the time to fabricate and build your product. Using your rough draft, fabricate the parts of your project and loosely fit them together. According to the dimensions you used when rough drafting your product, stick with those for now, and rework the products as needed and redimension them as needed.
This part can be meticulous, difficult, and time consuming depending on how detailed your rough draft was. Drilling holes, cutting boards, planing parts, and going back to the drawing board are going to be a temporary norm for this part, but it’s typical due to the nature when you create your own woodowrking plan.
Keep a Record of Everything You Do
This is important for the next step. How you crafted your product and what went into it will be in written form as instructions, much like a recipe for delicious food. When keeping records it’s important to do the following:
- Keep track of exact dimensions, angles, radii, notches and sizes of individual parts
- Keep track of distance, size and location of holes in wood
- Keep count of hardware used and the dimensions of the hardware
- Keep receipts of where you got all your materials and their individual costs
- Keep track of what type of wood(s) you used and dimensions
- Write down all the tools and machinery (if applicable) you used
- Keep a record of each step you performed during assembly
- Make a note of any glue, epoxy, or varnish you used
- Record how much time it took to fabricate parts of your product
- Record how much time it took to assemble your product
Keep at this process until you have a definitive assembled and definitive project you have created. This may not be necessary, but it’s a good idea to create the product a second time to verify repeatabiliity of fabrication. This is only to confirm that your product can be crafted on a “first cut” basis. Once material is ordered, tools are gathered, and assembly commences, you want your users to rest assured they have a solid plan, and not have to make up their own “methods” or improvise alone the way.
Create Step-by-Step Instructions
After you have realized your product, verified it can be recreated, failproofed the assembly process, and have a rough list of steps to do when creating the product, you are now able to craft your step by step instructions. With these instructions you will need all pertinant parts of an effective woodworking plan. For your convenience, we here at woodworking professionals have compiled a list of what you’ll need to have an effective plan based on our experience.
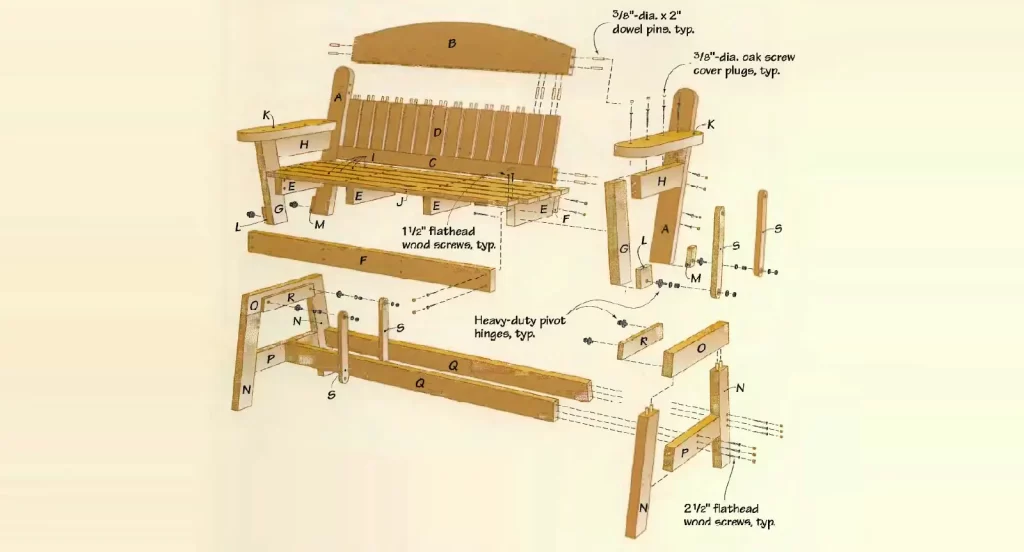
Pictures of The Product
Pictures of the product will be shown first and foremost. These pictures can be take with a simple backdrop and an iphone or later model android phone with a decent camera. You preferably wwant to do this in a place where the intended use environment is involved in the picture. If you have the means, it’s effective to make an exploded view of the product so a woodworker can se at a glance what they are making and how it’s puit together.
Parts and Their Identifiers
All parts of the product must be clearly drawn and dimensioned so a woodworker can see how to parts look at a glance. This means include the part, the material, the indentity, and quantity if more than one piece is required. All parts must have dimensions, tolerances if applicable, and identifiers so a woodworker can know what part to look for in each step and where to put it. Identifiers are usually called out as letters just like most products that require assembly.
Hardware and How They're Identified
Hardware used should have a clear picture of what they look like to avoid confusion. With this picture, they usually have a name and sometimes a letter identifying them. In each step, there should be a required quantity and an identified use of the hardware involved. If you have the means, show an exploded view of your product and where the hardware goes. If you do not have that, it’s a good idea to have a picture or video showing how the part is installed available to the user.
List Required Tools
This has already been determined in a prior step, but that did not guarantee your list may change. In the case that it did, add it here, even if it’s a tool they may not use. It’s better to have more than your need. Usually a seasoned woodworker will have this already in place. As also mentioned before, be sure to have a list of alternative tools a user can use in the case they do not have a tool or even a machine available for a certain step.
Determined Accurate Budget
An accurate cost can be determined if and only if you list out where you got the hardware, and assume the user will buy the materials, hardware, and other requirements from the same place. It’s also safe to assume your user already has some of the hardware in their possession. This being the case, it’s best to simply mention a price range that a product may cost. Make it wide and be realistic about the higher and lower end.
Stated Safety Requirements
It’s proper to mention safety in any plan and in every step just to cover the woodworker who will be crafting your plan. This is critical if they are using heavy or rotating machinery, creating something that produces a lot of sawdust, or are dealing with heavy parts. Although the safety of woodworking should be taken into consideration before starting ANY woodworking project, it’s always welcomed that a user considers what they’re getting theirselves into. Encouraging proper safety protocol before starting their woodworking project is a great way to ensure no occurences happen.
Clear and Comprehensive Written Step-by-step Instructions
The written instructions of a plan are probably going to take up the most time of your project as these are written to be as comprehensive and as clear as possible. Most instructions may not be as clear to everyone as you may like, but that is what the pictures are for. Making the pictures of what to do during a step clear can do more good for your instructions, even if your instructions are poorly written.
Review and Finalize
Now is the time to finalize your plan. After following all the steps required to create a woodworking plan, you are ready to verify it is finished. Finalizing design details is not just about precision; it’s about making informed decisions that align with your project’s purpose and requirements. It is also about your end user and their ability to make your creation come to life. Whether it’s a bench that doubles as a picnic table, a coffee table with storage, or even an exquisite executive desk for an office, this quality step will need to be oassed before you publish your wokr for the wild.
Eliminate Confusion and Errors
Review your plan and make sure you have reduced the number of errors, mispellings, grammatical errors, and mispunctuations. Also, ensure the steps are in the proper order. If there is anything that didn’t make any sense, reword it, or change it so it doesn’t seem ambiguous.
Are your pictures clear? Has anything changed that affected another step? Are the quantities of materials nad hardware accurate? Be sure to check over everything. This is the part where you can “perfect” everything. All you need to do is ensure your products plan is easily followable, and your user can recreate your finished product as designed.
Get A Friend To Review It
For verification, get a friend to follow your plan and proofread it. Get all the feedback you can from them. Just ensure the plan is followable and there are no gaps in your plan. Even if they are not a woodworker their questions and concern are highly valuable. Your main focus is to fix issues that would prevent someone following your plan from stop because they do not know how to proceed. Eliminate all these errors, and you will be golden.
Publishing Or Selling Your Plan
Publishing your plan means taking ownership of it and passing it off the end user through whom ever requrested it. Trademarking this plan is completely up to you. If you’d like to get into trademarks, a webesite called trademarkia.com can definitely help out with that. You can sell your plan as part of a catalog of plans or you can sell your plans individually and market it as you please. At the end of the day, what you did was create a woodworking plan. What you want to do with your beautiful creation is yours. It’s ready.
Conclusion
Crafting a woodworking plan is a meticulous process that demands attention, insight, and precision. A well-rounded plan not only serves as a structural outline but also as a guiding beacon throughout the woodworking journey, ensuring that every step is well-thought-out and every detail is considered. This comprehensive guide has provided a structured approach to create a coherent and effective woodworking plan, from understanding project requirements and conducting research to drafting detailed plans and executing them successfully.
By defining clear objectives, conducting thorough research, developing detailed designs, selecting appropriate materials, outlining the construction process, preparing accurate budgets, and being willing to adapt, woodworkers can navigate the intricacies of woodworking projects with confidence and precision. Seeking feedback and continuously learning from experiences and mistakes further enhances the quality of work and enriches the woodworking journey.
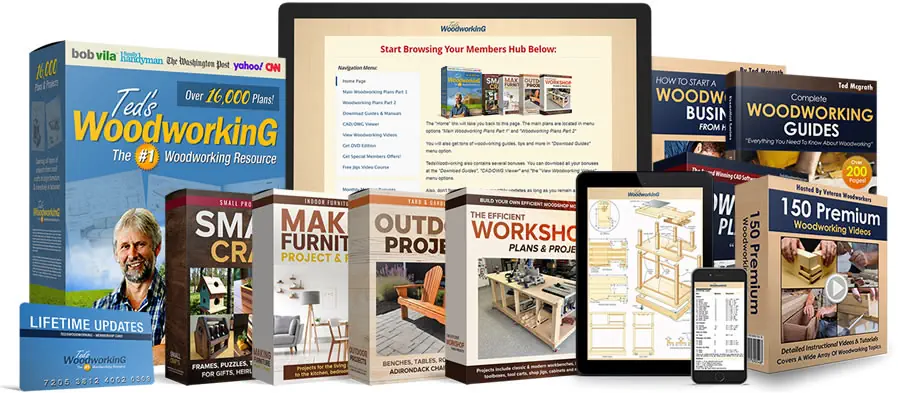
To get started quickly, we suggest Ted’s Woodworking. With it, you get 16000+ plans to build with very clear woodwork plans, videos showing you how to woodwork like a pro, and even a free DWG/CAD plan viewer for better visuals! It even has a program that shows you how to start a business with woodworking. If you’re a beginner, a professional woodworker, seasoned carpenter, or even seek to start a business with woodworking, this product is for you.
To get dtarted, click the link or the image below.